The Three T’s to Achieve an Intricate System of Tubing
The Three T’s to Achieve an Intricate System of Tubing
Andrew Hitchcock, Associate Product Manager, Swagelok and Rob Nyhuis, Training Manager, Swagelok Eastern Australia | New Zealand
Consider this scenario: You have been asked to fabricate a new fluid system at your facility and you know of two ways you can complete the job. One way is by using an assortment of pipe fittings you have available on your site. You know that it’s easy to build but you are also aware that it is very time consuming due to all the connections needed. It is also prone to leaks due to the number of threaded connections and has obstructed flow paths because of the elbows you will be using for the job. In addition, you know these systems can be difficult to maintain in the future.
Recognizing all this, you decide instead to take a different approach and use tubing to reduce the number of connections and improve the ease of system maintenance. However, the installation requires multiple runs of small diameter tubing. The catch? Not all have simple 90-degree bends.
Tube bending is frequently thought of as a fine art with unavoidable trial and error. But in reality, it doesn’t take extensive knowledge or complicated math to achieve quality tube installations. In fact, with the right knowledge and technique, you can achieve accurate bends resulting in faster installation with fewer components providing fewer leak points, all while providing a better flow path and extended component life.
Achieving quality tube installations boils down to the three T’s: tooling, technique, and training.
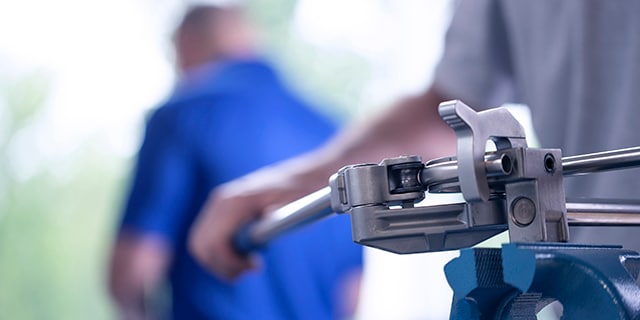
Tooling: Start with the Basics
Just like the scenario above, tube installations require planning, which will require tube bent to exact specifications; achieving the perfect bend starts with using the right tool.
Hand tube benders are available with many options, but you ultimately want to select a hand tube bender designed to increase the likelihood of doing the job right. That said, your tool should help reduce the potential for kinking or deformation during the bending process.
It’s recommended to use a hand tube bender with the following features:
- Clevis handle design: Provides enhanced leverage for bends greater than 90° to avoid repositioning the tubing in the bender
- Minimum bend mark: Ensures tubing can be fully bottomed into the fitting, minimizing the possibility of leaks
- Roll dies: Reduces bending force and tube ovality compared to conventional slide block design
- Tube latch: Secures the tubing and holds it in place during the bending process
- Multiple angle marks: Minimizes potential mistakes when making bends of different angles
Properly bent tubing ensures that your system is leak tight and the right tool for the job makes this process significantly easier. For maximum assurance of reliability, it’s preferred to use tube cutting equipment designed to reduce potential damage to the tubing during the tube preparation process.
Technique: Achieving Precision, Alleviating Pressures
As the saying goes, bad tube work stands out equally as much as good tube work. Learning to bend tube accurately not only achieves great looking results but can improve system performance by mitigating turbulent flows brought about by too many multi-radius bends. Turbulent flow can also introduce unnecessary system vibration and can shorten a system’s functional life.
Tubing that is put into a fitting at anything other than straight will exert what is known as side load and cause stress fractures, one of the leading causes of tubing failure. These mistakes require downtime to fix, additional labor and material costs to repair and put employees’ safety at risk.
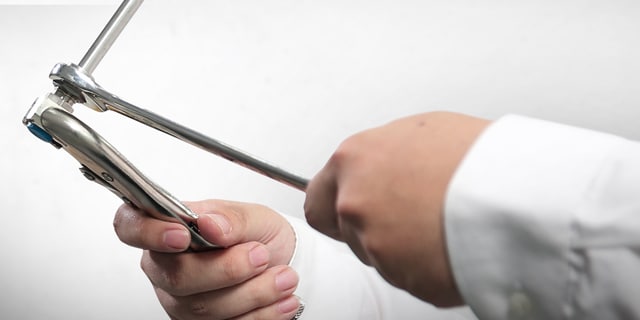
Precision tube bending can help achieve better flow through the system and extend the life of the tubing. When using a hand tube bender, quality is a matter of following two key rules: measuring exactly and bending accurately.

Prior to making bends, it is necessary to mark the tubing. It’s important to first make a reference mark on the end of the tubing to indicate where layout measurements begin and a mark to indicate where the tube should be aligned in the bender. Always make this mark a full 360° around the tubing.
Bending Accurately
For Bends 90° or Less:
After properly positioning the tubing in the bender, slowly push the short handle down until the “0” on the roll support reaches the desired degree mark on the bender die.
After completing the bend, unlatch the tubing and carefully remove it from the bender groove. Avoid scratching or marring the tubing during removal, since this could adversely affect sealing surfaces.
For Bends Greater Than 90°:
When the “0” on the roll support reaches the 90° mark on the bender die, loosen the short handle from the clevis by rotating it counterclockwise (approximately four turns).
Then swing the short handle up until it is slightly above the perpendicular position in relation to the long handle. Retighten the short handle. Now you will have continual right angle leverage for the rest of the bend. Continue the bend until the “0” on the roll support reaches the desired degree mark on the bender die.
Before you begin your tube bending, you should begin planning your tube line routing – something that can have a big ROI for complex systems. It’s important that you lay out your bends using a diagram and think about what obstacles might be in your way, along with things that may need to be installed in the future. Your goal should be to make the system easier for future maintenance by leaving fittings as accessible as possible and focusing on logical design.
Training: Continually Improve Your Technique
The evolution of modern tooling shows just how precise tube bending has become. While application-specific challenges can make some level of unpredictability unavoidable, certified training sessions can help ensure sound installation and give you a better chance of achieving the perfect bend every time.
Could your team benefit from achieving correct bend angles and identifying bend defects? Our Swagelok-certified trainers can help your team stay ahead with best practices around how to design, install, and maintain even the most complex fluid line assemblies.
Related Articles
Your Industrial Fluid System Safety Checklist
Follow these best practices to enhance the safety of your industrial fluid system.
How to Install Tube Fittings
Learn how to install tube fittings using the proper fitting installation techniques in order to improve facility safety, reliability, and profitability.

Tackling Practical Performance Issues in Fluid and Sampling Systems
Learn practical tips on how to improve the performance and accuracy of your fluid and sampling systems from Swagelok.